
7 Tiger Photography Tips Our Guides
Wish Every Guest Knew
The tiger appeared without warning.
One moment, the forest track was empty. The next, a magnificent Bengal tiger stepped out from the tall grass, paused briefly and began walking towards the trees.
Cameras came up. Shutters clicked. Everyone scrambled to adjust their settings.
Thirty seconds later, the tiger was gone.
Back at the lodge, one photographer had a beautifully sharp image. Another had an overexposed photograph. Someone else had focused perfectly on the grass behind the tiger.
They had all witnessed the same extraordinary moment.
But their photographs told very different stories.
This is something experienced wildlife guides and photography mentors understand well: great tiger photography is rarely just about having an expensive camera.
It is about preparation, patience, reading wildlife behaviour and making the right decisions before the animal appears.
Whether you are planning your first safari or returning to India’s forests with years of experience, these seven tiger photography tips can help you make the most of your time in the wild.
And some of them have surprisingly little to do with your camera.
1. The Best Tiger Photographs Often Begin Before You See the Tiger
One of the most valuable lessons experienced safari guides can teach you is to pay attention to the forest before reaching for your camera.
A tiger rarely announces its arrival.
But the forest sometimes provides clues.
A sambar deer may give an alarm call. A group of chital may suddenly stop feeding. Langurs might begin watching a particular patch of vegetation.
Fresh pugmarks on a forest road may suggest that a tiger has recently passed through.
These signs are part of the art of tiger tracking in India.
Experienced local guides learn to interpret them through years of observing the same landscapes.
However, no individual sign guarantees that a tiger is nearby. Alarm calls can be triggered by different predators, and animal behaviour must always be interpreted in context.
For photographers, the real advantage is preparation.
If your guide suspects that an animal may emerge from a particular direction, you have an opportunity to check your camera settings, assess the light and prepare your composition.
Instead of reacting after the tiger appears, you are ready before the encounter begins.
The practical tip: Listen when your guide asks for silence. Watch where the other animals are looking. Keep your camera accessible and your settings ready.
Sometimes the most important photographic decision happens several minutes before you press the shutter.
2. Set Your Camera for the Tiger That Might Move, Not the One Sitting Still
Imagine a tiger resting peacefully beside a waterhole.
You adjust your camera for the relatively static subject and begin taking photographs.
Then, without warning, the tiger gets up and starts walking.
Your shutter speed is too slow.
The result? A blurred photograph of an otherwise extraordinary encounter.
This is one of the most common problems wildlife photographers face.
Tiger photography often involves unpredictable movement, changing light and limited time to react.
That is why understanding tiger safari photography settings before entering the forest is so important.
Recommended Starting Settings for Tiger Photography
There is no single setting that works in every situation, but these are useful starting points.
For a resting tiger:
- Shutter speed: Approximately 1/250 to 1/640 second, depending on focal length, stability and subject movement.
- Aperture: Around f/4 to f/5.6 where your lens allows.
- ISO: Adjust according to available light.
- Focus: Continuous autofocus or a carefully placed focus point on the eye.
For a walking tiger:
- Shutter speed: Approximately 1/1000 to 1/2000 second.
- Aperture: Use a sufficiently wide aperture to maintain shutter speed.
- ISO: Auto ISO can be useful when moving between sunlight and shade.
- Focus: Continuous autofocus with subject tracking where reliable.
For a running tiger or fast action:
- Shutter speed: Start around 1/2000 second or faster.
- Focus: Continuous autofocus with a suitable tracking area.
- Drive mode: Continuous burst shooting.
- ISO: Allow it to rise when necessary to maintain a usable shutter speed.
These settings are guidelines rather than guarantees. The ideal exposure depends on your camera, lens, available light and the animal’s movement.
Why Auto ISO Can Be Your Friend
India’s forests can create difficult lighting conditions.
A tiger might move from bright sunlight into deep shade within seconds.
If you are manually adjusting every exposure setting, you may lose valuable time.
Many wildlife photographers prefer manual exposure mode with Auto ISO, allowing them to control shutter speed and aperture while the camera adjusts sensitivity.
However, Auto ISO behaviour and exposure compensation controls vary between camera models.
Practise with your equipment before the safari.
The practical tip: Start each drive with settings that can handle movement. You can slow your shutter speed for a resting animal, but recovering a missed action shot is impossible.
A little preparation can save a once-in-a-lifetime moment.
3. Stop Photographing the Tiger for a Moment. Start Watching Its Behaviour.
This may sound strange in an article about tiger photography.
But sometimes the best thing a photographer can do is stop looking through the viewfinder.
Watch the animal.
Is the tiger resting?
Is it scanning its surroundings?
Has it become alert to a sound?
Is it walking purposefully through the forest?
Understanding behaviour helps you anticipate photographic opportunities.
For example, a tiger drinking at a waterhole may provide an opportunity to capture reflections, body posture and interactions with its surroundings.
A tiger walking through grassland might create a stronger photograph when its body is visible between patches of vegetation.
A resting tiger may offer opportunities for detailed portraits, provided the animal is visible and the viewing distance is appropriate.
Experienced guides can help explain what these behaviours may indicate.
But wildlife behaviour is not completely predictable.
An animal that appears ready to move may remain in the same place for another hour.
The objective is not to predict every movement perfectly.
It is to become a more observant photographer.
Think About the Next Photograph
Instead of taking fifty nearly identical photographs of a resting tiger, consider what might make the next image more meaningful.
Could the animal change its position?
Is the light improving?
Would a wider composition show more of its habitat?
Is there an interesting interaction taking place?
These questions encourage thoughtful photography rather than simply accumulating images.
The practical tip: Spend time observing the tiger without your eye pressed against the camera. Understanding the moment often helps you photograph it better.
And remember, a tiger’s behaviour should never be manipulated to create a photographic opportunity.
4. Focus on the Eyes, but Don't Forget the Rest of the Frame
A tiger’s eyes can make a wildlife photograph extraordinarily powerful.
When the eyes are sharp, the viewer often feels a stronger connection with the subject.
But achieving accurate focus is not always straightforward.
Tigers move through grass, branches, shadows and uneven terrain.
Autofocus systems can sometimes lock onto vegetation in front of the animal instead of the tiger itself.
Modern cameras with animal-eye detection can be extremely helpful, but their performance varies depending on the camera model, subject distance, lighting and obstructions.
Even sophisticated autofocus systems can make mistakes.
How to Improve Focus Accuracy
For relatively unobstructed subjects, animal-eye detection or subject tracking can work well when your camera supports reliable tiger recognition.
When the tiger is partially concealed by grass or branches, a smaller autofocus area may provide more control.
Continuous autofocus is generally useful for moving subjects.
And when photographing a resting tiger, take a moment to check that the eye is genuinely sharp rather than assuming the camera has focused correctly.
Sharpness Is Not Everything
A photograph can be technically sharp and still feel uninteresting.
A perfectly focused tiger against a cluttered background may be less compelling than a thoughtfully composed environmental image.
Try looking beyond the animal itself.
Consider the direction it is facing, the available space in the frame and the relationship between the tiger and its surroundings.
The practical tip: Prioritise accurate focus, especially around the eyes, but remember that composition and storytelling are equally important.
A technically perfect image is not always a memorable photograph.
5. Don't Just Photograph the Tiger. Photograph the Forest Around It.
When a tiger appears, the natural instinct is to zoom in as much as possible.
And understandably so.
The details of a tiger’s face, stripes and expression can make extraordinary photographs.
But there is another approach that experienced wildlife photographers often appreciate.
Step back visually.
Include the habitat.
A tiger walking through the sal forests of Kanha tells a different story from one resting beside the rocky landscape of Ranthambore.
A tiger emerging from the grasslands of the Terai creates another kind of image entirely.
The surroundings are not merely background.
They help explain where the animal lives.
Think in Three Types of Photographs
The portrait: A tighter composition emphasising the tiger’s face, expression and details.
The behavioural photograph: An image showing the tiger walking, drinking, resting, interacting or engaging in another natural activity.
The environmental photograph: A wider composition showing the tiger as part of the forest, grassland or landscape.
Each tells a different story.
If you spend the entire safari trying to fill the frame with the tiger’s face, you may miss opportunities to capture the character of the destination.
Light Matters Just as Much
India’s tiger reserves offer dramatically different lighting conditions.
Early morning light can create warm tones and long shadows.
Overcast conditions may provide softer, more even illumination.
Harsh midday sunlight can create strong contrasts between bright fur and deep shadows.
Backlighting may produce interesting silhouettes or illuminate the edges of the animal’s fur.
Rather than treating every lighting condition as a problem, learn to work with it.
Photographing in RAW format can provide additional flexibility when adjusting exposure and colour during editing.
The practical tip: Before zooming in, ask yourself whether the surrounding habitat could make the photograph more interesting.
Sometimes the strongest tiger photograph is the one where the tiger occupies only a small part of the frame.
6. Pack for a Safari Vehicle, Not a Photography Studio
One of the most frequently overlooked aspects of wildlife photography gear for India is practicality.
You may own an excellent collection of lenses, tripods and accessories.
But carrying everything into a safari vehicle does not necessarily improve your photographs.
Space can be limited.
Dust is common.
The vehicle may move over uneven forest roads.
And when an animal appears unexpectedly, you need to access your equipment quickly.
The best safari photography setup is often the one you can operate comfortably without disturbing other guests.
What Camera Gear Should You Bring?
A telephoto zoom lens: A 100–400mm lens is a versatile option for many wildlife situations. Longer zooms, such as 150–600mm or 200–600mm, can be useful for distant subjects, although they are heavier and may be harder to handle in confined spaces.
A second, shorter lens: A 70–200mm lens or a wider zoom can be valuable for environmental photographs, landscapes and animals that appear relatively close.
Spare batteries and memory cards: Long safari days and continuous shooting can use more power and storage than expected.
A lens cloth and dust protection: Forest roads can be dusty, particularly during the dry season.
A comfortable camera strap: Useful when moving through uneven terrain inside a safari vehicle.
A suitable camera support: A beanbag may be helpful where permitted and practical. Tripods and other supports may be restricted or unsuitable in some reserves, so always check local regulations.
You do not need every item on this list.
The right equipment depends on your camera system, experience, budget and photographic goals.
Should You Rent a Bigger Lens?
Not necessarily.
A longer lens can help when wildlife is distant, but it also introduces challenges.
Long focal lengths magnify camera shake and make it harder to locate moving subjects quickly.
A lighter lens that you know how to use may produce better results than an unfamiliar, heavy lens rented specifically for the trip.
Before investing in new equipment, understand what your existing camera can do.
For travellers joining guided wildlife photography tours, discussing equipment with the tour organiser before departure can help avoid unnecessary purchases.
The practical tip: Familiarity with your camera is more valuable than carrying equipment you have never practised using.
The forest is not the ideal place to learn where your autofocus settings are hidden.
7. The Best Photograph Is Never Worth Disturbing a Tiger
This is the most important tip of all.
A tiger is walking along a forest track.
The light is beautiful.
The background is perfect.
But the animal begins moving away from your vehicle.
You could ask the driver to follow it more closely.
Perhaps you could get a better angle.
Perhaps you could capture the photograph you have been waiting for.
But should you?
Responsible wildlife photography requires understanding that the animal’s welfare comes before the image.
Wild tigers are not photography subjects placed in a controlled environment.
They are predators moving through their natural habitat.
Their behaviour should not be manipulated for visitors.
That means no baiting, no chasing, no attempts to provoke a reaction and no pressure on drivers to leave authorised routes or violate park regulations.
It also means respecting the judgement of local guides when they decide that an animal needs space.
Why Ethical Photography Makes Better Wildlife Stories
A photograph of a tiger behaving naturally tells an authentic story.
A photograph obtained by disturbing an animal may look impressive, but the experience behind it is fundamentally different.
This is why responsible wildlife tourism matters so much on photography-focused safaris.
At Ethical Wildlife, we believe the most meaningful wildlife encounters happen when animals are allowed to behave naturally.
Our approach emphasises patient observation, knowledgeable local guides and respect for the landscapes we visit.
We do not believe in chasing wildlife or forcing encounters for photographs.
Sometimes that means waiting.
Sometimes it means keeping a greater distance.
And sometimes it means putting the camera down altogether.
The practical tip: If getting the photograph requires disturbing the animal, let the photograph go.
There will always be another opportunity to improve your photography.
The tiger should not have to pay the price for it.
Why Experienced Guides Make a Difference to Tiger Photography
Camera settings can be learned from a tutorial.
Lens specifications can be compared online.
But understanding a forest takes time.
Experienced local guides spend years observing animal movements, recognising alarm calls, understanding habitats and learning how wildlife responds to changing conditions.
Their knowledge adds something that no camera specification can replace.
A photography-focused tour leader can build on that expertise by helping guests prepare for encounters, understand photographic opportunities and reflect on the images they capture.
This combination is one of the reasons wildlife photography tours in India can be valuable for both beginners and experienced photographers.
The benefit is not simply having someone point towards a tiger.
It is learning why the vehicle stopped, why the guide chose to wait, why the light matters and why an animal’s behaviour is more interesting than a perfectly posed photograph.
On well-designed guided wildlife photography tours, the experience becomes about much more than collecting images.
It becomes an opportunity to develop your fieldcraft, observation skills and understanding of wildlife.
Great Tiger Photography Begins With Respect and Preparation
The most memorable tiger photographs often come from moments that cannot be planned.
A tiger stepping into a shaft of morning light.
A brief glance through tall grass.
A reflection in a forest waterhole.
An unexpected encounter on a quiet track.
You cannot control when these moments happen.
But you can prepare yourself to recognise and photograph them.
Listen to your guides. Understand your camera. Learn to observe behaviour. Think about composition. Carry equipment you can handle comfortably.
And above all, respect the animal.
At Ethical Wildlife, our wildlife journeys are designed around the belief that great photography and responsible wildlife viewing belong together.
Because the ultimate goal is not simply to return home with a photograph of a tiger.
It is to return with a deeper understanding of the animal, its behaviour and the forest it calls home.
The best wildlife photographers don’t just know when to press the shutter. They know when to wait.
FAQs
Q – What are the best camera settings for tiger photography?
Ans – For a walking tiger, a shutter speed around 1/1000 to 1/2000 second is a useful starting point. Continuous autofocus, an appropriate aperture and Auto ISO can help manage movement and changing light. For resting animals, slower shutter speeds may work if the camera is stable. Settings should always be adjusted to the conditions.
Q – What lens is best for tiger photography in India?
Ans – A 100–400mm telephoto zoom is a versatile choice for many safari situations. Longer lenses such as 150–600mm or 200–600mm can be useful for distant wildlife. The ideal lens depends on your camera sensor, handling preferences, vehicle space and photographic style.
Q – Is a 300mm lens enough for tiger photography?
Ans – A 300mm lens can be sufficient for many tiger photography opportunities, particularly when an animal is relatively close. However, longer focal lengths may be useful for distant subjects. A zoom lens offers flexibility when wildlife changes position.
Q – Do I need a professional camera for a tiger safari?
Ans – No. Entry-level DSLRs and mirrorless cameras can produce excellent wildlife photographs when used effectively. Understanding shutter speed, autofocus, light and composition is often more important than owning the most expensive equipment.
Q – What should I pack for wildlife photography in India?
Ans – Useful equipment includes a telephoto lens, spare batteries, memory cards, cleaning cloths, dust protection and a comfortable camera strap. A second lens can help with wider environmental photographs. Check reserve regulations before bringing tripods, beanbags or other supports.
Q – Are guided wildlife photography tours suitable for beginners?
Ans – Yes. Guided photography tours can help beginners understand camera settings, composition, wildlife behaviour and field techniques. More experienced photographers may benefit from local knowledge, behavioural interpretation and opportunities to develop their photographic storytelling.
Q – How can I photograph tigers in low light?
Ans – Use a wide aperture where possible, increase ISO when necessary and choose a shutter speed appropriate for the animal’s movement. Modern cameras can often produce usable images at higher ISO settings, although results vary. Accurate focus and good camera handling are especially important in low light.
Q – Is it ethical to photograph wild tigers?
Ans – Yes, provided photography does not disturb the animals or violate park regulations. Responsible photographers avoid baiting, chasing, provoking or approaching wildlife inappropriately. The animal’s welfare should always take priority over obtaining a photograph.
Ethical Wildlife curates small-group, photography-led safaris in India and Africa. They specialise in tiger safaris in Bandhavgarh, snow leopard expeditions in Ladakh, and a multitude of trips that connect travellers with nature, ethically and meaningfully. Their focus is on deep experiences, guided by expert naturalists and photographers, and they hold their journeys to inspire, educate and respect nature and the wild.



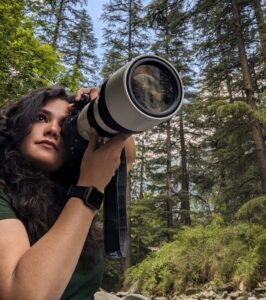 Apoorva Jadon